
Hi everyone!
Here’s finally the post about getting DynaMaps elements inside Revit! All of this uses version 2019.2.20 of Dynamaps and Dynamo 2.0.3 so please first make sure you’re up to date.
Before we get to the actual topic, let me just introduce two new elements you may notice in the new version of the view extension :
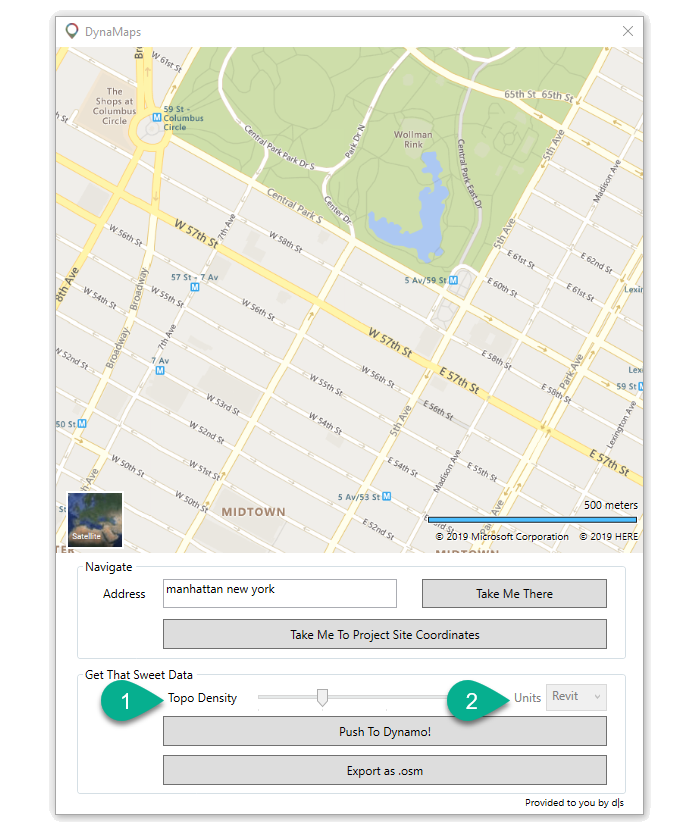
Topo Density:
The new topo density slider control lets you specify how dense you want the topo point grid to be. It ranges from 10 to 40 (10×10 grid to 40×40 grid). It is unnecessary to have a very high density on a small region because close points are likely to have same elevation. The implementation of this feature started after a talk with the people over at the Gereative Design Intensive Residency held by Autodesk in Torronto where I had the pleasure to lead a break-out session about DynaMaps. There were many interesting suggestions that I am working on for next releases.
Units:
DynaMaps is now free from Revit ! It works with standalone Dynamo Sandbox, Formit, Autocad Civil 3D etc. So this “Units” setting can be used to pick between meters / feet when working outside of Dynamo Revit. If you are using DynaMaps in Dynamo Revit, the units will automatically be those of the project.
Now here are the quickest workflows to get the geometry inside Revit !
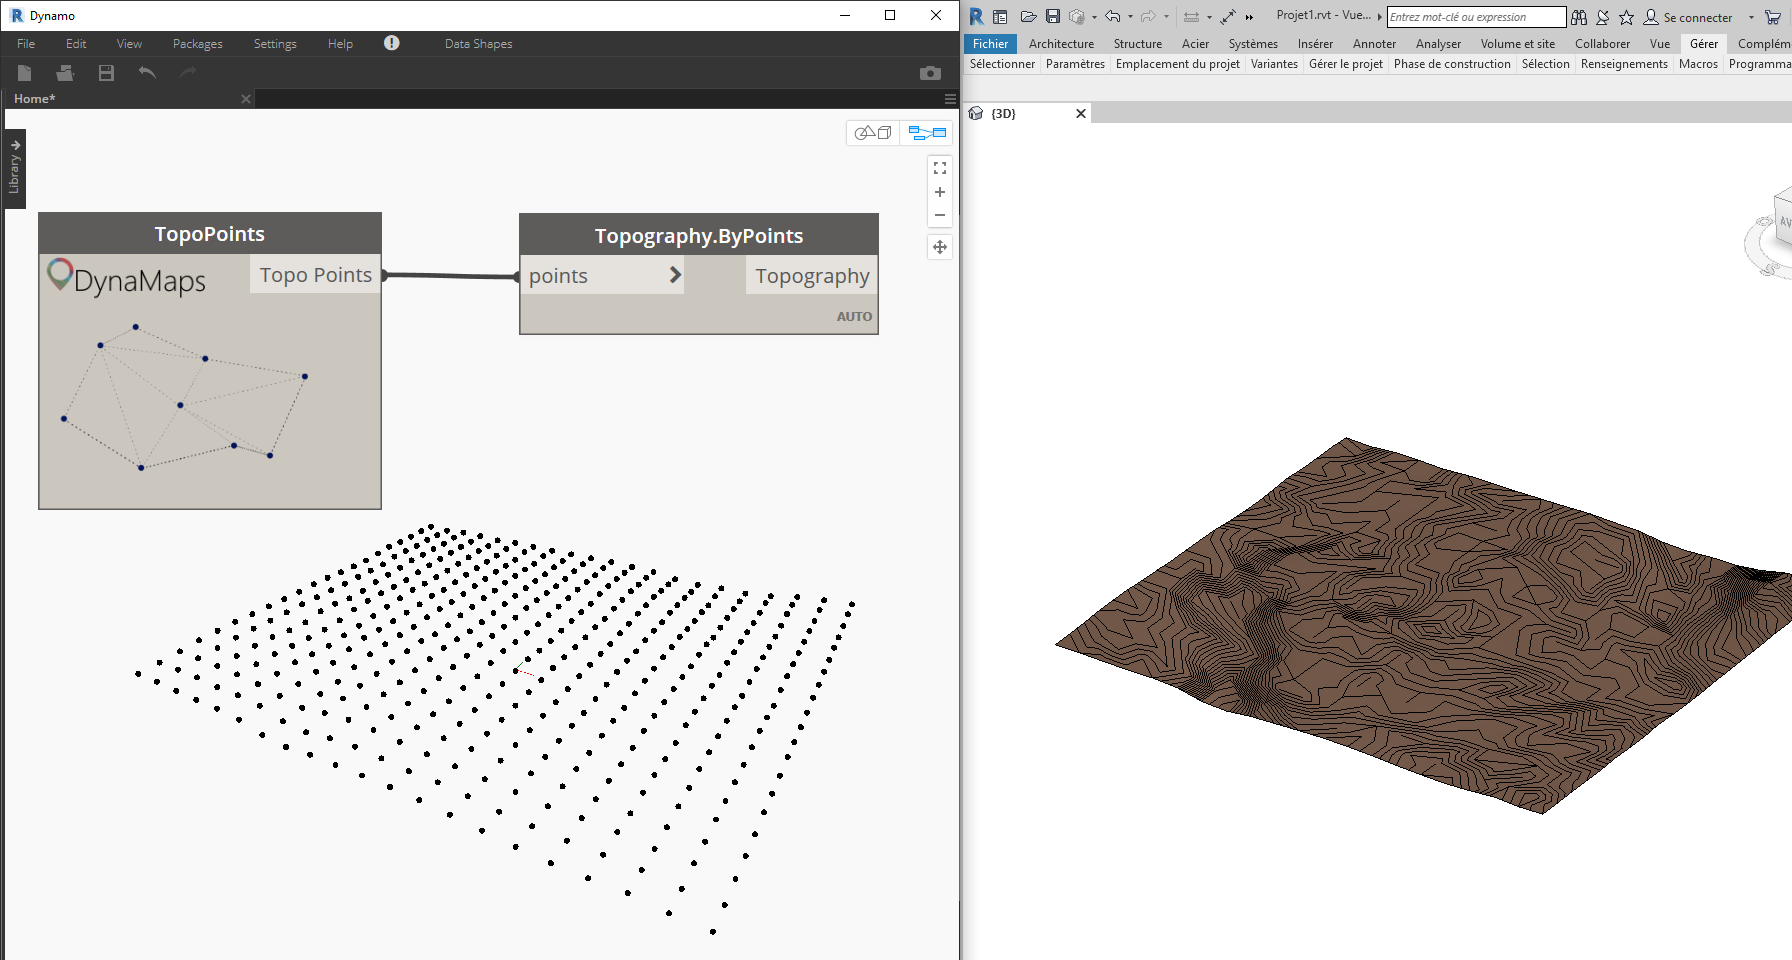
Topography
Buildings
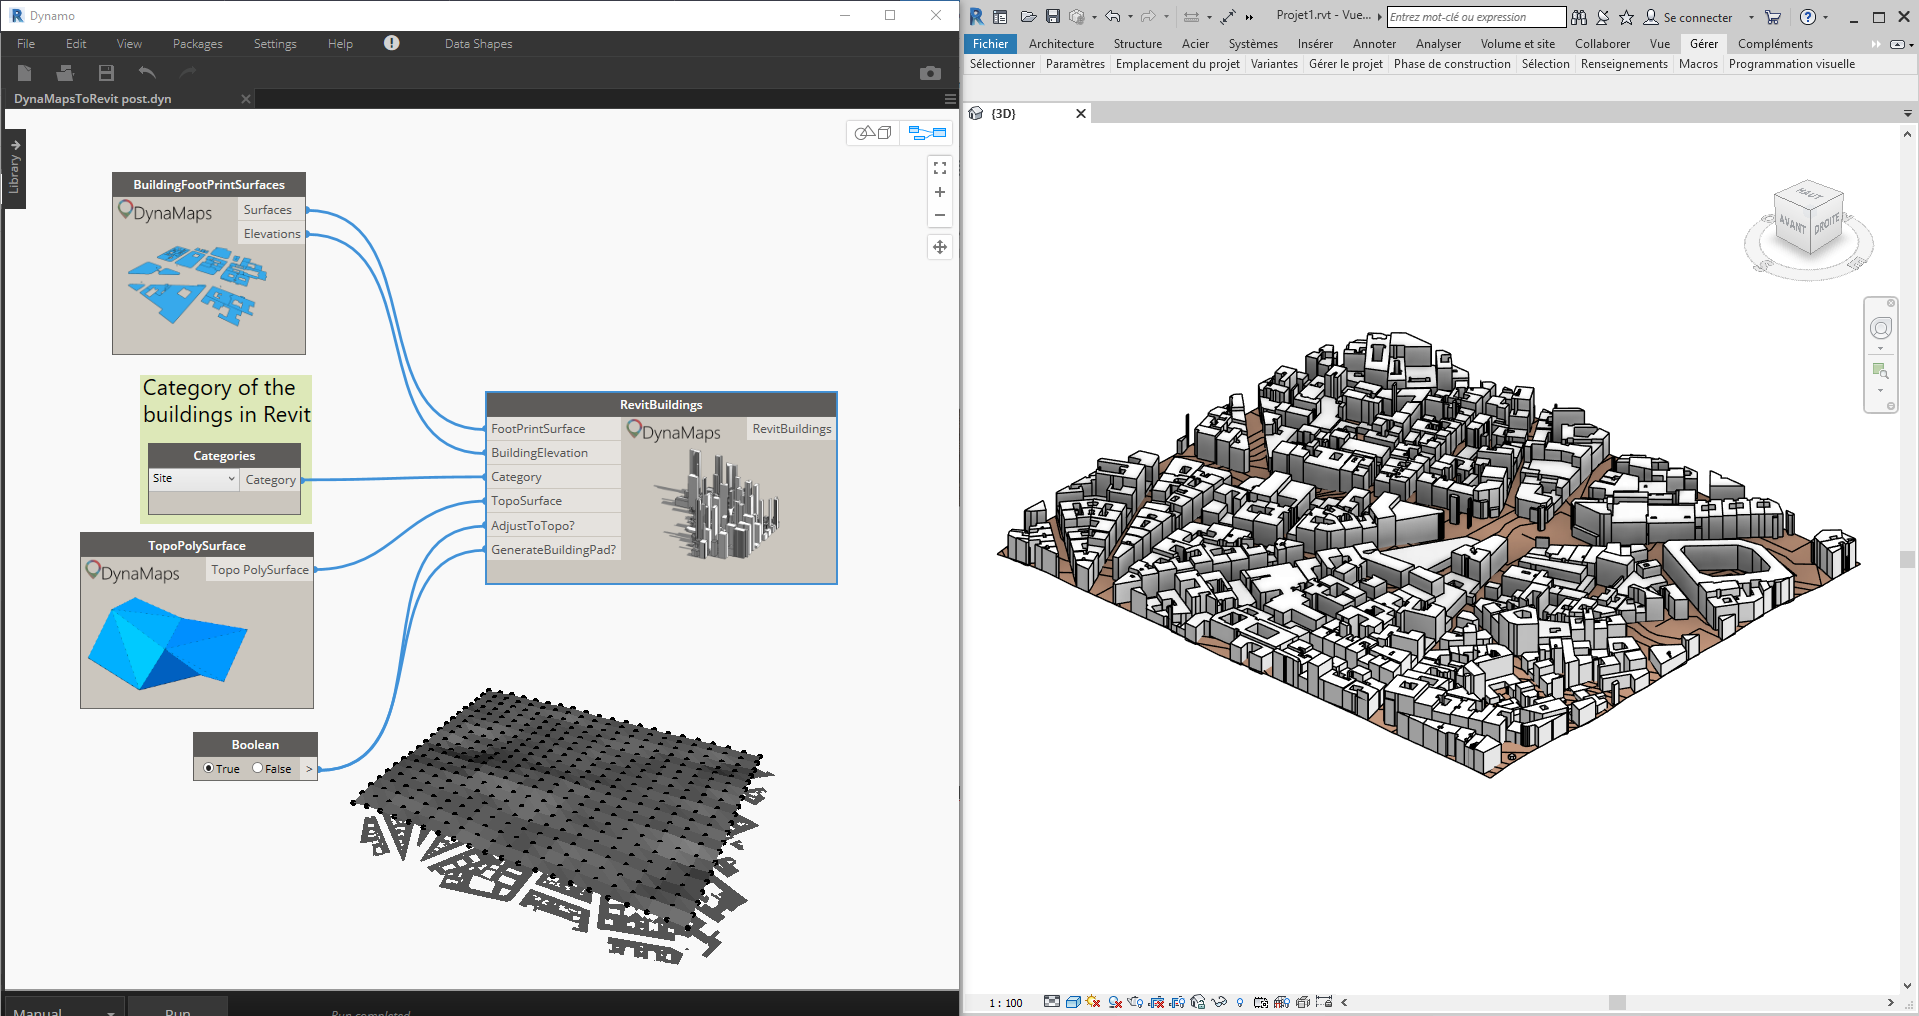
note: Setting “Generate Building Pad” to true will automatically generate the pads for some clean Revit Geometry. If you wish to use this option, make sure you create the Revit Topography first!
The buildings are generated following the topography of the site

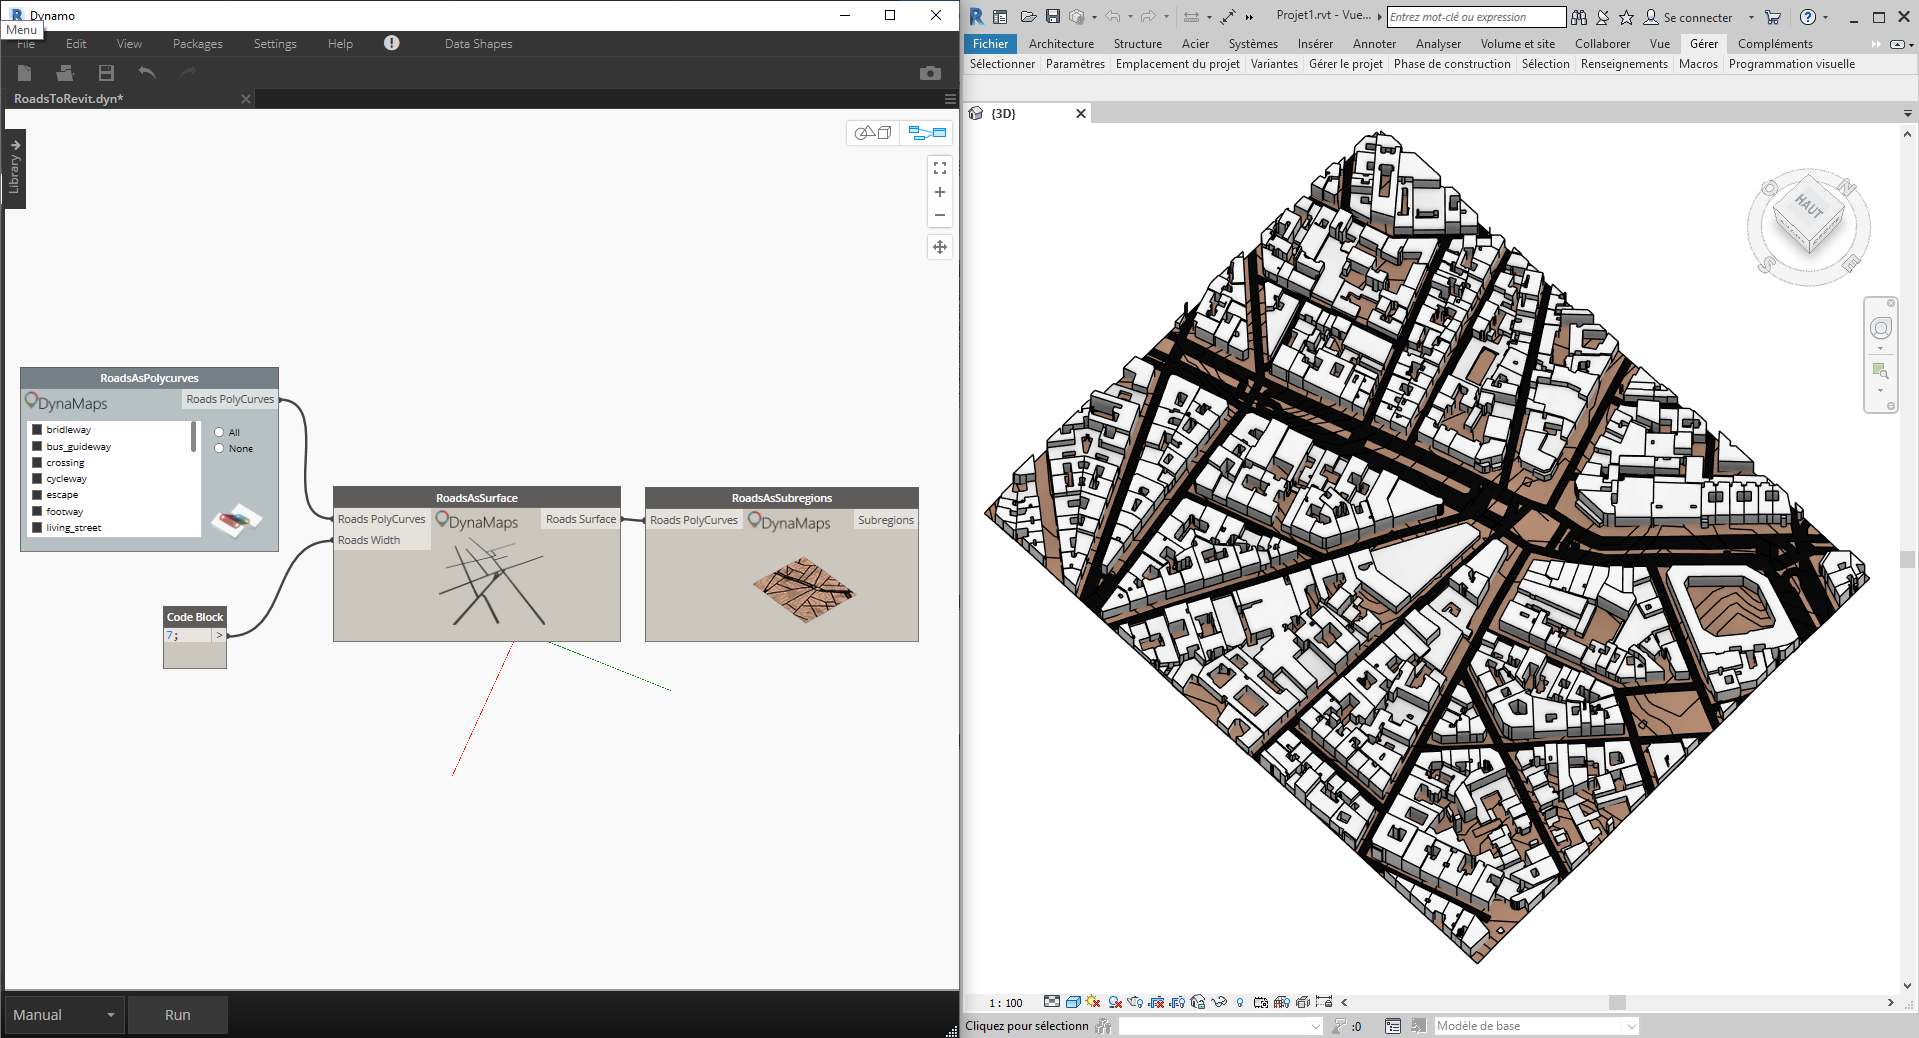
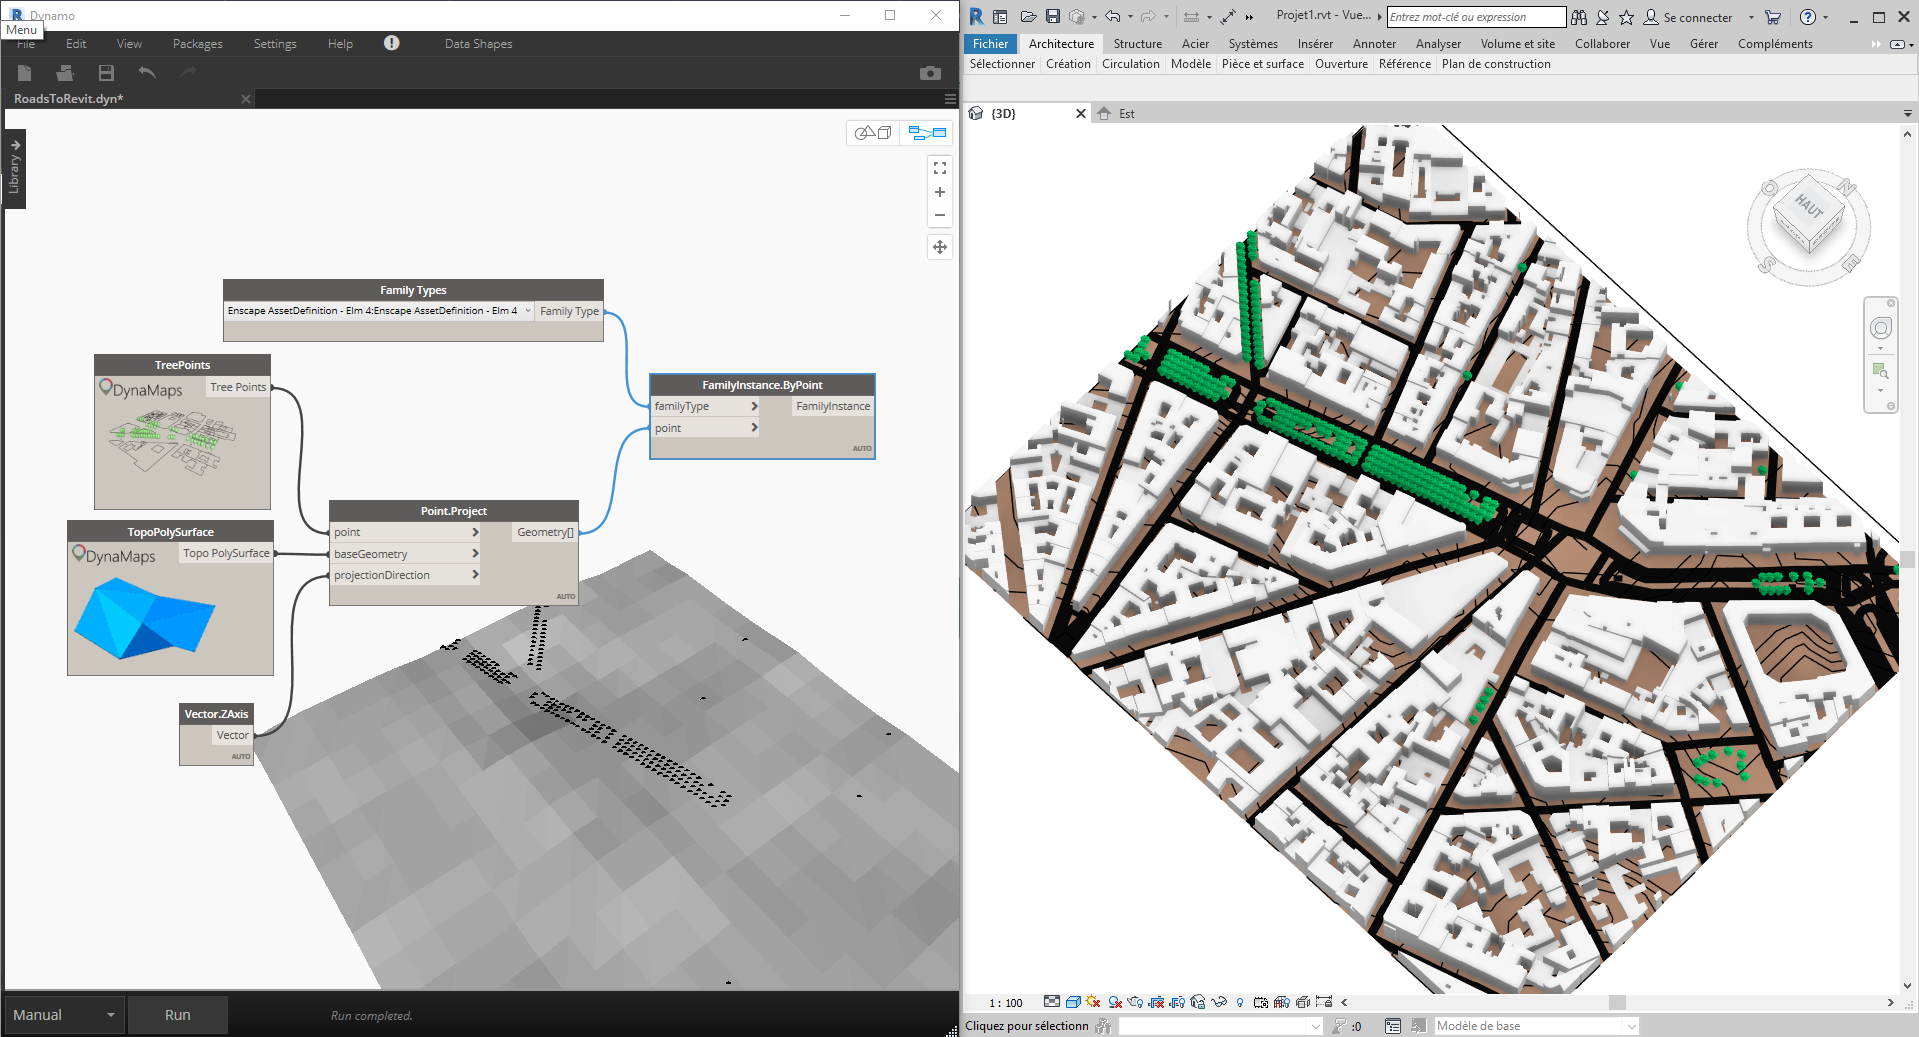
Roads
There is a new node in the package for this purpose! DynaMaps roads can be easily imported as subregions :
Trees
Importing trees can simply be done using the out of the box “FamilyInstance.ByPoint” node. If you’re lucky enough to have the Enscape asset library, then you can use them and get a nice immersive result!
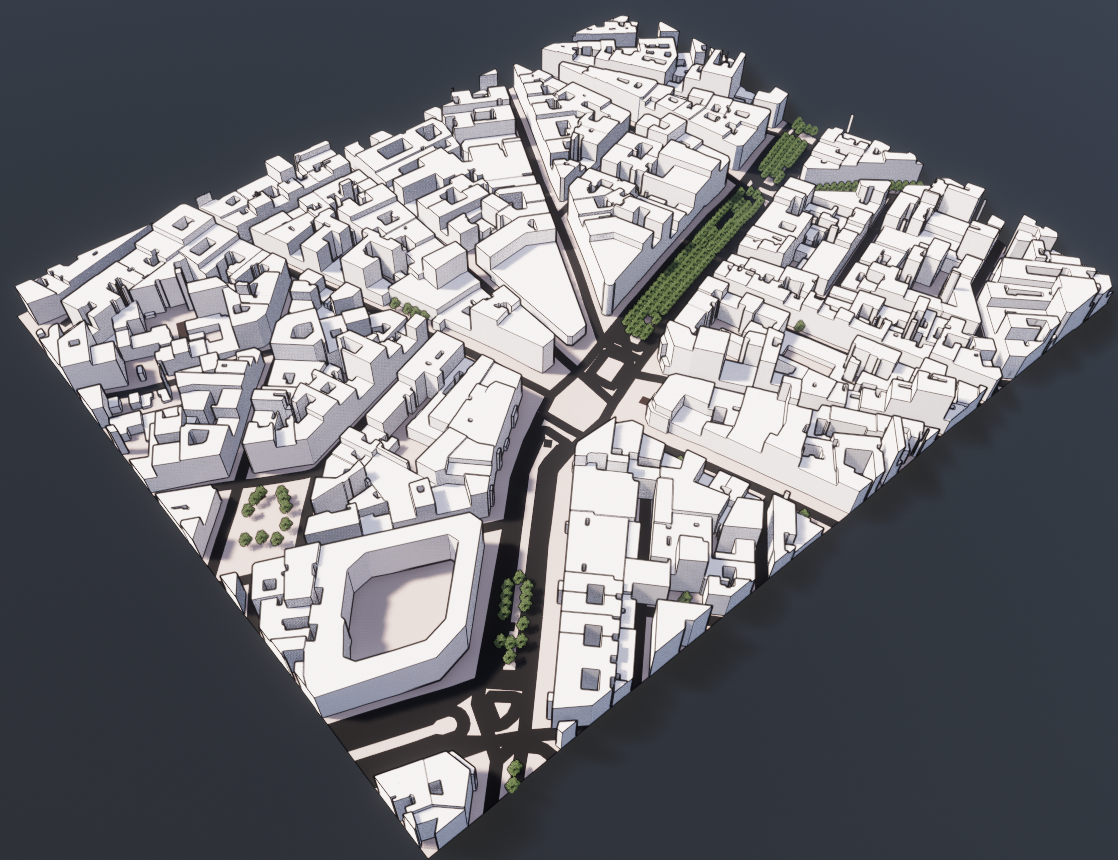
And here is the final result in Enscape!
Thanks for reading and please feel free to comment!


Leave a reply to Mario Le roux Cancel reply